|
|
3 days ago | |
|---|---|---|
| .. | ||
| _assets | 3 days ago | |
| esp32 | 3 days ago | |
| web | 3 days ago | |
| .gitignore | 3 days ago | |
| README.md | 3 days ago | |
| README_ZH.md | 3 days ago | |
README.md
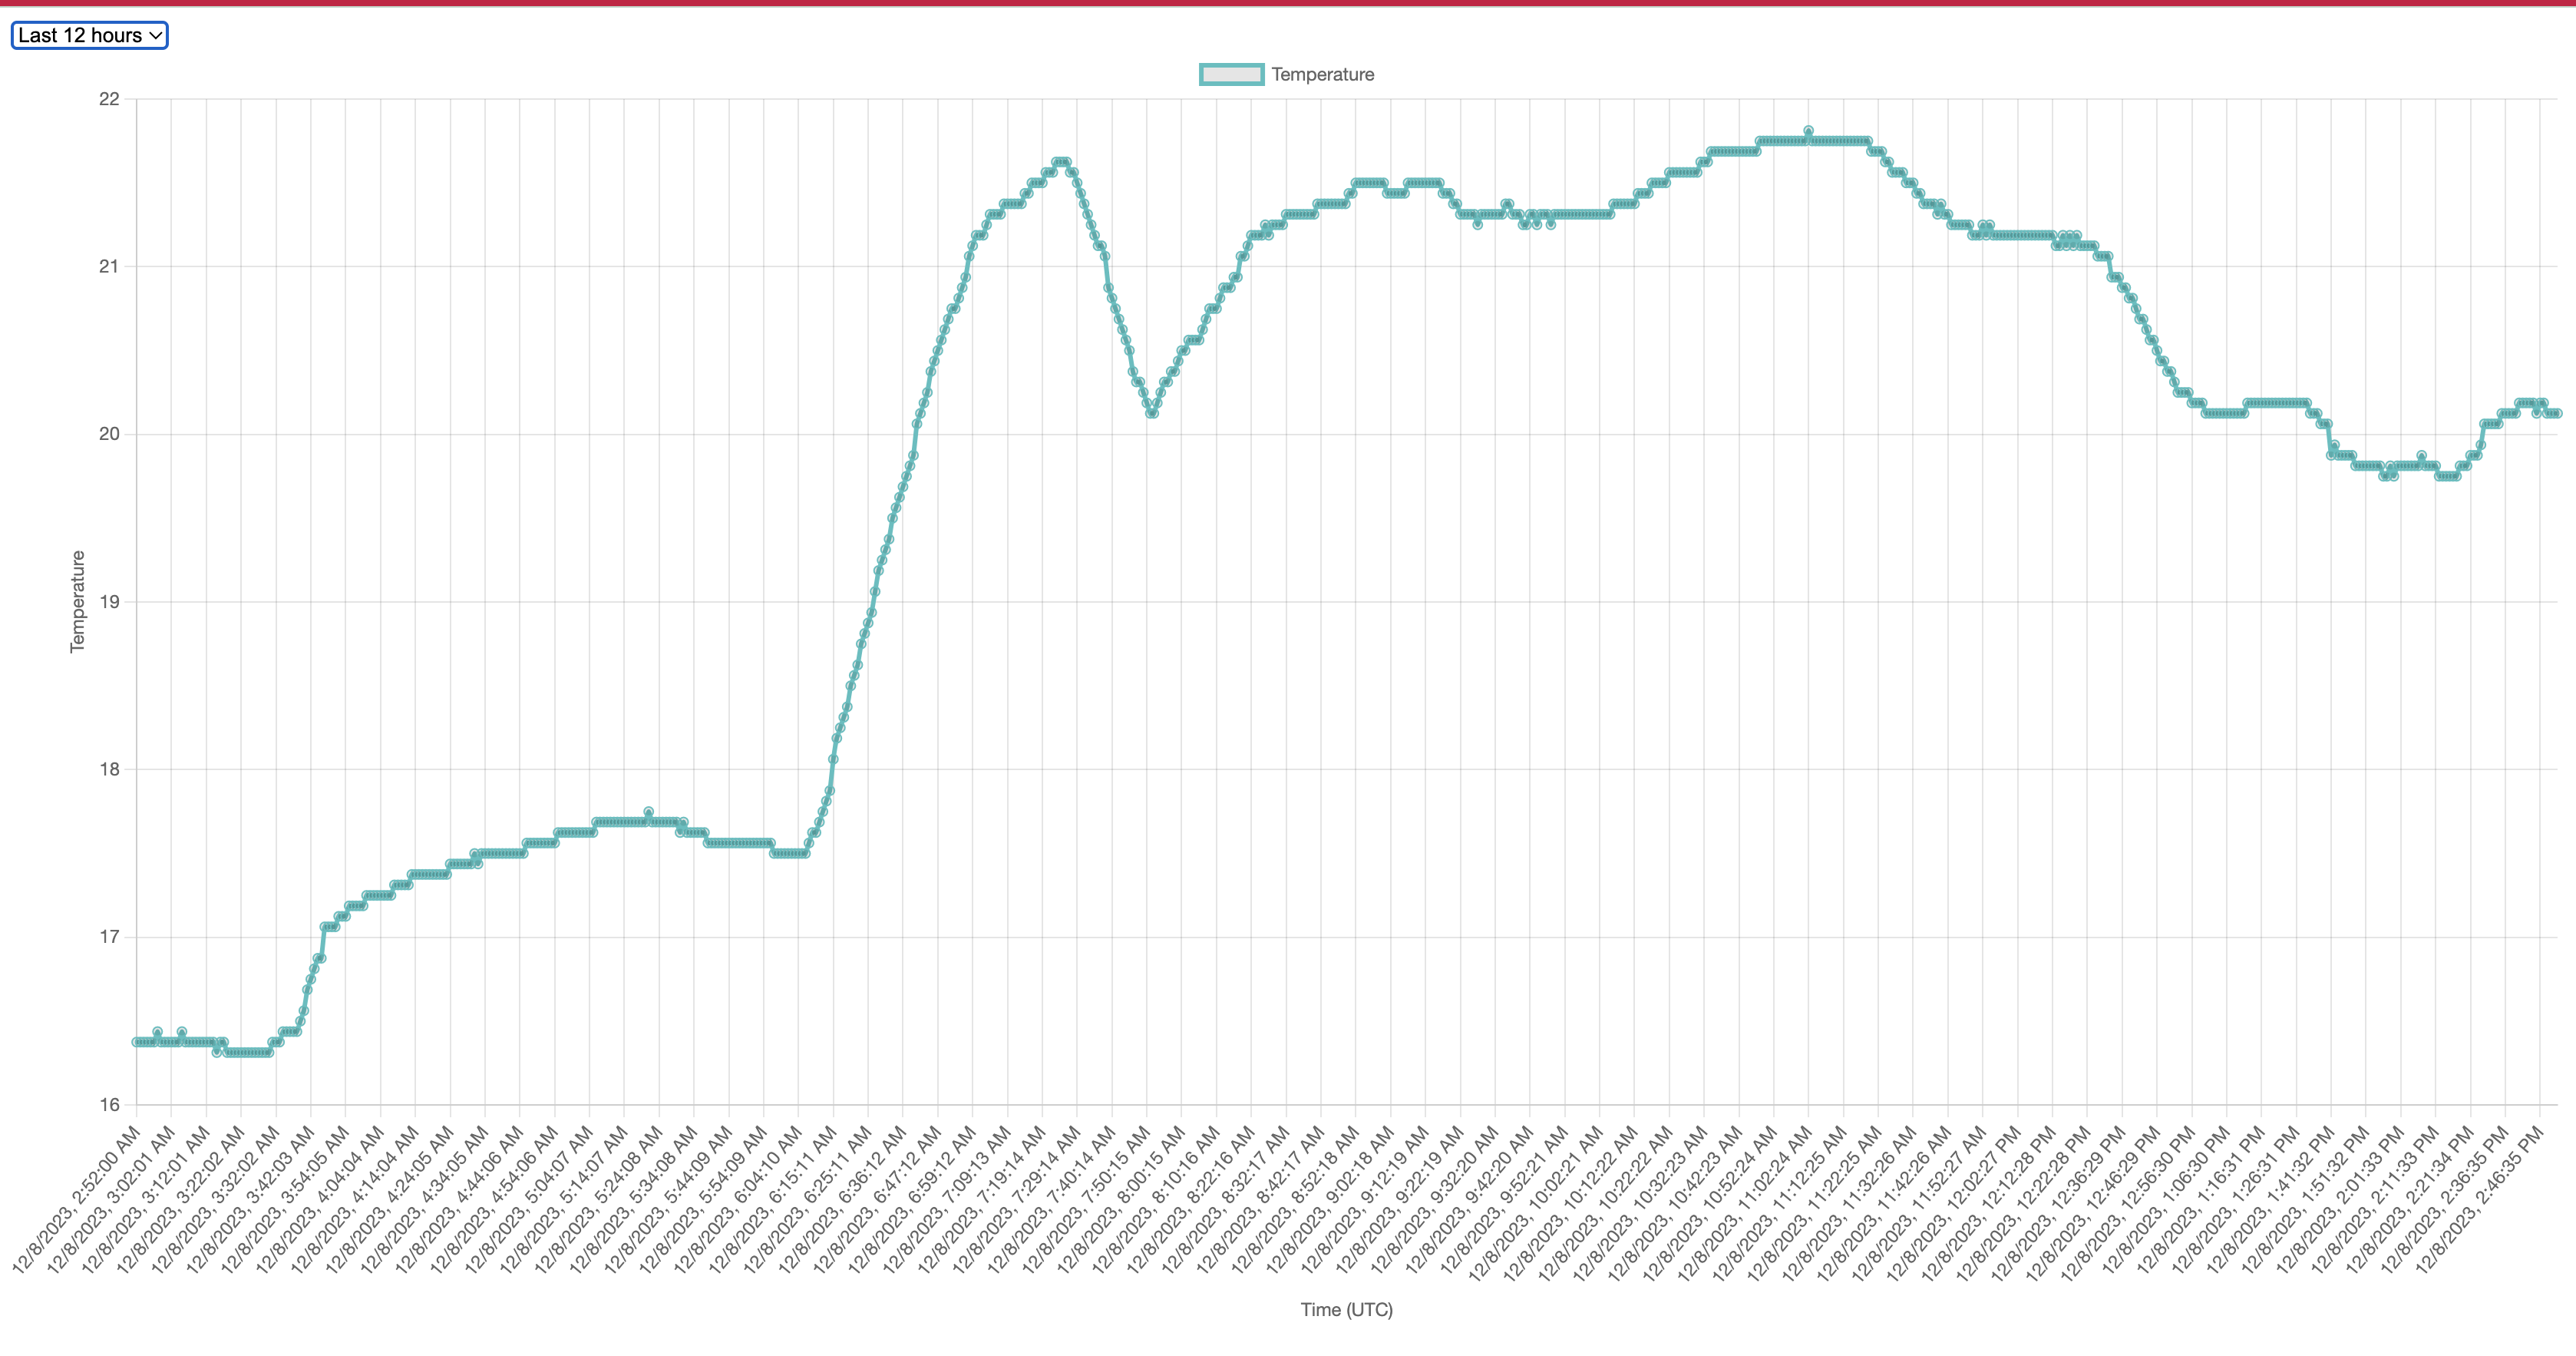
ESP32 Temperature Monitoring and Web Application Project
This project consists of two main parts: an ESP32 device sending temperature data using MQTT and a Flask-based web application that displays this data.
Part 1: ESP32 Temperature Monitoring
Requirements
- ESP32 Development Board
- DS18B20 Temperature Sensor
- Arduino IDE with ESP32 support
- Wi-Fi connection
Configuration and Setup
-
Install the Arduino IDE: Download and install from Arduino website.
-
Add ESP32 Support in Arduino IDE: Follow the instructions here.
-
Install Required Libraries: In Arduino IDE, go to
Sketch>Include Library>Manage Libraries...and install:WiFiPubSubClientArduinoJsonOneWireDallasTemperature
-
Configure Wi-Fi and MQTT Settings: Modify the provided ESP32 code in Arduino IDE with your Wi-Fi and MQTT details.
-
Connect the DS18B20 Sensor to ESP32:
- DS18B20 VCC to ESP32 3.3V
- DS18B20 GND to ESP32 GND
- DS18B20 Data to ESP32 GPIO 25

-
Upload the Code: Connect ESP32 to your computer, select the correct board and port in Arduino IDE, and upload.
Part 2: Flask Web Application
Requirements
- Python 3.8 or later
- Virtual environment tool (e.g.,
virtualenv)
Local Setup
-
Clone the Repository:
git clone [Repository URL] cd [Repository Name] -
Create a Virtual Environment:
python -m venv venv source venv/bin/activate # Windows: venv\Scripts\activate -
Install Dependencies:
pip install -r requirements.txt -
Configure MQTT Settings in
app.py: Modify MQTT configuration inapp.py. -
Run the Application:
python app.pyAccess at
http://localhost:8080.
Deploying to Fly.io
-
Install Fly.io CLI: Follow instructions on Fly.io documentation.
-
Login to Fly.io:
flyctl auth login -
Initialize Fly.io App:
flyctl launch -
Deploy the App:
flyctl deploy -
Verify Deployment:
flyctl status